Virtual tabletop (VTT) for local, in-person RPG sessions
Consider supporting this project

Virtual tabletop (VTT) for local, in-person RPG sessions
dungeoneering is a free and slimmed down virtual tabletop (VTT) that can be used as a combat grid and as a dungeon exploration tool, made for local, in-person tabletop RPG sessions. It can load static and animated maps, has a dynamic lighting system, can be easily used with D&D 5e games, and more.
The main goal here is to make an application with all the basic features needed to run a tabletop RPG session. It should be easy to install, set up, and run and should have a minimalistic, intuitive, and hopefully pretty user interface.
Latest Version
The latest stable version , available for Windows, Linux and macOS, can be downloaded on this page. It’s also available, along with release notes, on the project’s releases page. There’s also a changelog with all notable changes made to this project.
Installation
- On this page or on the releases page, download the appropriate ZIP file for your operating system.
- Extract all files to a folder of your choice —
Documents/dungeoneeringfor example. - Run
dungeoneering,dungeoneeringDm, ordungeoneeringPlayersdepending on the screen configuration you plan to use. See Single and Dual Screen Modes below.
Windows
The application should work with the instructions above. If it doesn’t, create an issue, please.
macOS
The macOS ZIP is unsigned, meaning macOS will complain about it. Once you unzip it, right-click on each of the executables and choose Open. If asked, grant access to the Documents folder since that’s where dungeoneering saves its log files on macOS.
Linux
To run dungeoneering on Linux, you will need to install GStreamer v0.10. It’s an older version of GStreamer so it might be difficult to find the right packages to install. If you are using Ubuntu 18.04 or 20.04, this script should install everything you need. If you are using another Linux distribution, create an issue please and I will try to help.
How to Use It
Here’s a video showing how to create a scene from scratch in dungeoneering:
If you prefer a text description, read on.
To see how a scene looks like once it’s composed you can load one of the demo scenes that come with the application. Click on the load scene button ( ![]()
*.json files) from the data/scenes folder.
To create a new scene follow the steps below. It might be better to do this when preparing an RPG session and not during it since your players might get bored while they wait.
- Click on the map setup button (

- Click on the grid setup button (

- Add player (


- Set up walls (


- If it’s a combat scene, first add tokens to the initiative order widget by right-clicking on them, then choosing Settings, and then clicking on the initiative button (


- Save your scene using the save button (

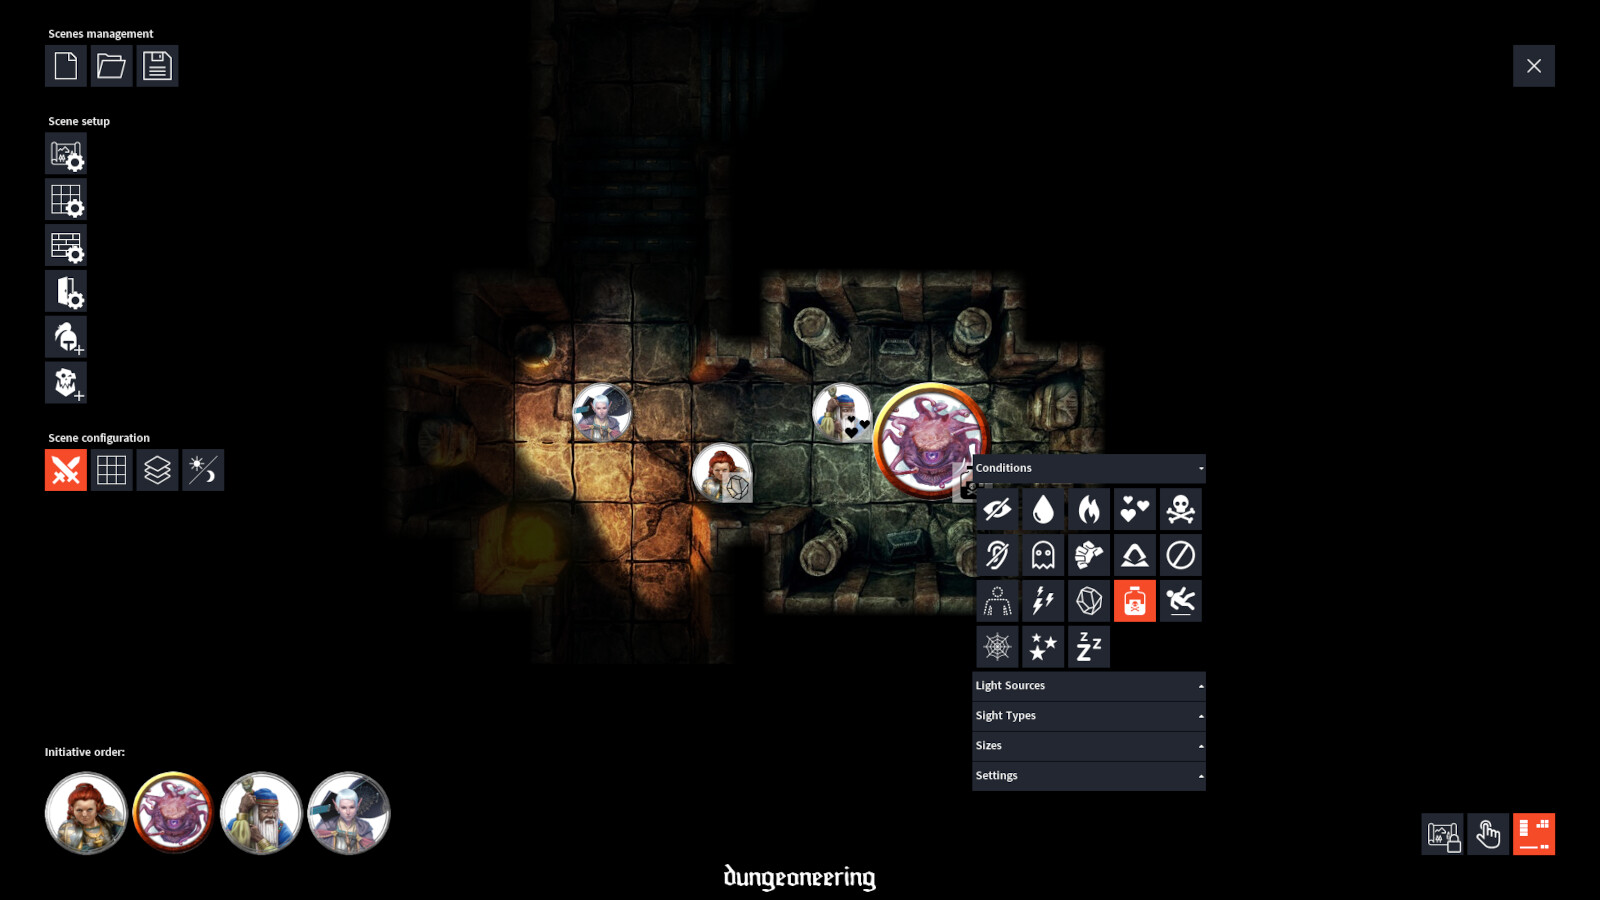
And that’s it! Now that you have set up your scene, players and DM will have a virtual tabletop where they can drag their tokens around the map; right click on them to add conditions, light sources, and sight types (e.g., darkvision); pan and zoom the map as needed; players can reveal hidden parts of the map with the dynamic lighting system; and hopefully with all that you and your group will have more fun in your RPG sessions. :)
Single and Dual Screen Modes
If you are going to use a single screen, to be shared by DM and players, run the executable called dungeoneering and you are all set.
If you want to use two separate screens connected to the same computer, one for the DM and another one to be shared by your players, run dungeoneeringDm first and once the application loads, run dungeoneeringPlayers. The two applications should work as a single virtual tabletop now. At startup they should connect to each other and once they do, a scene loaded in the DM app should load in the players’ app as well. After that any changes made in the scene should be replicated in both directions - a token moved by a player should move in the DM app, a condition applied by the DM should show up in the players’ app, same for any other changes made in the scene.
Remember to disable any network software, such as VPN or proxy, before running dungeoneering in dual-screen mode. In this mode, dungeoneering uses network ports to connect the two apps and in my tests, some network software caused problems and didn’t let the two apps connect properly.
Contributing
dungeoneering code can be loaded, edited, and run directly in Processing IDE. Install Processing (v4.x), go to Sketch > Import Library > Manage Libraries and install “Video Library for Processing 4”. Then clone this repository, open the dungeoneering.pde file in Processing, and press Run (▶).
Bugs can be reported through the project’s issues page. Also, there’s a list of features to implement and known bugs to fix in the TODO list.
Known Issues
-
Dialog windows may appear behind the full-screen application, forcing users to switch between open windows to find the dialog that was just opened.
-
Video and audio playback can be glitchy depending on the format/codec/framerate of the video being used. If you are having trouble with some of your video maps, try re-encoding them to 1080p30. In Windows it’s quite easy: use HandBrake and in the Preset field choose General > Fast 1080p30. Create an issue if it doesn’t work even after re-encoding.
-
Tokens may look pixelated if zoom in is used, even if loading high-resolution token images.
License
Copyright © 2019-2023 Luis Castilho
dungeoneering is licensed under the GPLv3. See LICENSE for details. dungeoneering also uses components from other open-source projects. Their code and license can be found at these links:
- Processing 4
- Processing Video
- ControlP5 - Forked and customized
- PostFX
- UiBooster
- Apache Commons - IO and Lang
- rotating-fos
- Hazelcast IMDG
The icons used in dungeoneering were either released under a public-domain-like license (CC0) or are free to use with attribution (CC BY 3.0, CC BY 4.0). Icons created by the following authors were used: Andrew Nielsen, Tokka Elkholy, Sweet Farm, HeadsOfBirds, Mike Rowe, Denis, Yu luck, Patrick Morrison, Sergey Demushkin, Maxim Basinski, and AbtoCreative from Noun Project; Delapouite, Lorc, and sbed from Game-icons.net; and Freepik and Good Ware from Flaticon. Thanks for their awesome work and for releasing it under an open license.
Assets
There are a few demo scenes bundled with the application. The assets used in these scenes can be found at or created using the following links.
- The Sword Coast and Siege of Bamburgh animated maps are from Animated Dungeon Maps.
- The Yawning Portal animated map was created by 3DMAcademy.
- The Abandoned Cabin map is from Mike Schley, available in this D&D article, © Wizards of the Coast.
- The Dungeons of the Grand Illusionist map is from Dyson Logos.
- The Lost Library map is from Paths Peculiar.
- The Cliff Edge map is from Sliph.
- All tokens were created using the Token Stamp tool with D&D 5th edition images, © Wizards of the Coast.
Thanks
Thanks to my awesome RPG group that supported me in developing this application and was patient enough to playtest it in our sessions. ![]()
")
")
")
")
")
")